

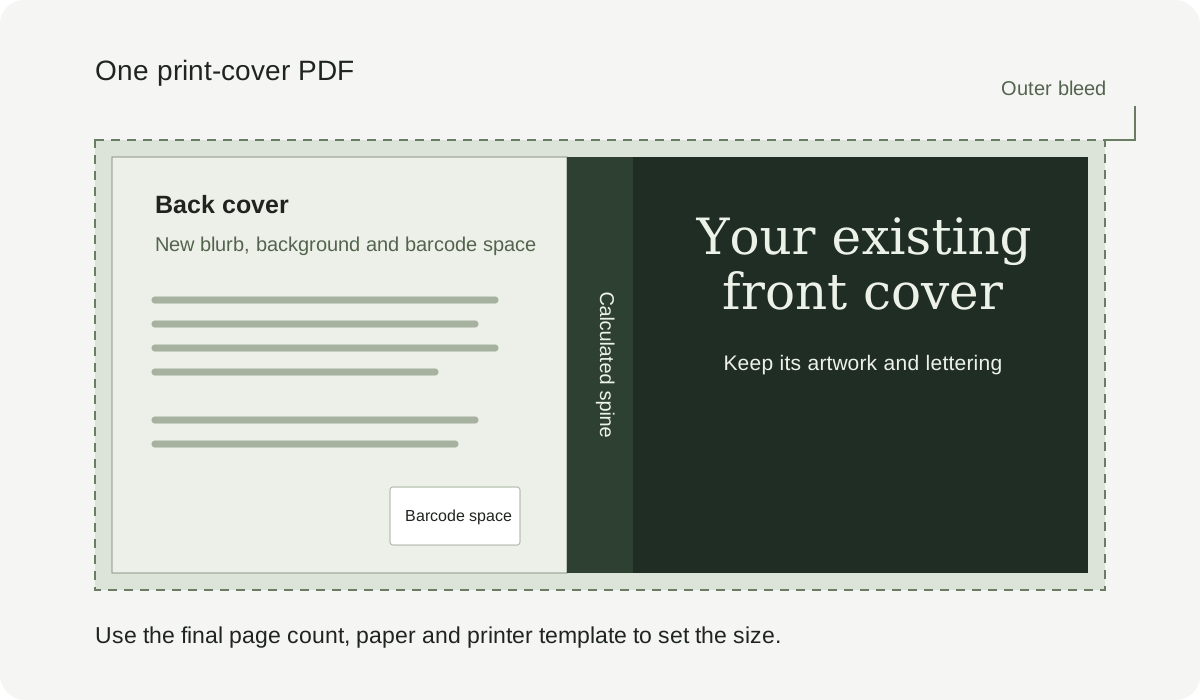
You do not need to throw away a front cover you like. The work is to carry its visual style across the rest of the printed book. Start with the highest-resolution original and the finished interior. Then build the back and spine around the front, rather than stretching the front image across the entire sheet.
1. Check what your existing file contains
A JPG or PNG is a single flat image. If it already contains the title and author, keep those words in the image and avoid adding a second title over them. They cannot be changed independently in that file. Use your original editable project if you need to change the front wording. If you have text-free artwork instead, add the title and author as editable text. Coverfairy can preserve an uploaded finished front while you edit the new back and spine.
2. Finish the interior before calculating the spine
Use the page count of the formatted interior PDF, including its opening and closing pages. Choose the printer, paperback binding, finished book size and paper. A change to the interior can change the spine, even when the front design stays the same. Use the KDP calculator for KDP; for IngramSpark, enter the exact spine width from its current title-specific template.
3. Bring the front into Coverfairy
If your front is already a finished JPG, PNG or WebP, upload it in the free book mockup tool, then choose “Build the KDP print wrap”. The same image continues into an editable project and the print setup opens. You can preview the wrap before paying for publishing files. If you are starting from a Coverfairy project, open its Print view instead. Keep a copy of your source image and inspect the crop so no existing title or author is cut off.
4. Design a back cover that belongs with the front
Choose a background colour from the front or use compatible text-free artwork. Give the blurb a clear, readable column. A short hook can sit above it, and an author note below it if needed. Keep the barcode space clear. In Coverfairy's back-cover controls, edit the words, choose text colours, and compare layout presets in the full-wrap preview. You can adjust the back without changing your uploaded front.
5. Set the spine and choose the barcode route
Match the spine's colour and lettering to the cover. Keep it readable at the actual printed width; leave out lettering when the book is too thin under your printer's rules. For KDP, you can leave space for its barcode or include a suitable barcode for the edition's ISBN. A barcode generator draws a code for an ISBN you already have; it does not assign an ISBN. Review placement against the current printer template.
6. Export the complete print PDF and check it
Use the Print download for the selected edition. KDP requires the back, spine and front in one PDF, with the background extending into the outer bleed. Check the exported sheet against the official template, preview it with the printer, and order a physical proof. Check image sharpness, small text and colours on the proof. A promotional mockup shows how the cover could look; it cannot confirm print quality.
What is free, and when do I need a pass?
The standalone mockup PNG is free. In the editor you can try the layout and inspect a watermarked cover draft. An active Coverfairy pass unlocks publishing exports, including the complete print-cover PDF. Downloading files and changing text, colour or layout do not use AI image credits. Creating new AI artwork uses credits. You can use your uploaded front throughout this workflow without generating a replacement.
Sources and verification
- Amazon KDP: create a paperback cover
- Amazon KDP: cover calculator and templates
- IngramSpark: official cover template generator
Requirements can change. Check the linked instructions before you publish or upload a file.
By Coverfairy Editorial · Published · Updated